

How to Safely Remove Gel Nails at Home: The Gentle Method
Knowing how to safely remove gel nails at home is the practice of gently buffing the cured protective topcoat, soaking each nail in acetone with sealed foil wraps, and softly nudging dissolved polish off without mechanical scraping. This careful dissolution technique preserves the underlying keratin cells, preventing the severe peeling, white patches, and structural brittleness caused by forceful stripping.
- Break the non-porous topcoat with a medium grit file to allow solvent absorption.
- Keep solvent in direct contact with the gel using sealed, pre-cut foil wraps.
- Allow adequate soaking time so the product lifts naturally without force.
- Slide softened polish away gently with a wooden stick rather than metal tools.
- Rehydrate bare nails immediately with nourishing plant oils and rich balms.
Gel manicures provide exceptional shine and durability, yet removing them improperly remains the single largest cause of post-salon nail thinning. When gel polish lifts at the free edge, the temptation to peel the remaining coating is strong. Peeling a cured manicure forcibly rips away delicate microscopic sheets of natural keratin along with the pigment, leaving behind rough texture and brittle free edges. By understanding how to safely remove gel nails at home through patient soaking rather than aggressive mechanical force, you preserve your natural nail plate for future beauty routines. Natural nails consist of overlapping cellular layers that split when separated from bonded resins. Prioritizing controlled chemical softening over pulling ensures your nail structure stays completely intact, healthy, and smooth throughout every seasonal transition.
What Do You Need to Remove Gel Polish at Home?
Gathering the proper supplies before you begin guarantees a seamless, mess-free experience that protects your hands from excessive dryness. Many traditional home setups involve cutting irregular squares of kitchen foil and shredding cotton balls, which easily slide around and leak acetone onto your skin. A streamlined routine relies on dedicated supplies that trap warmth and keep the liquid locked directly over the nail bed where it belongs. When you curate an intentional collection of gel nail removal tools prior to uncapping any bottles, you eliminate the frantic search for supplies halfway through the process. Having everything arranged cleanly across your workstation prevents airborne solvent evaporation, preserves ambient body heat, and protects the delicate surrounding skin from prolonged contact with active chemicals.
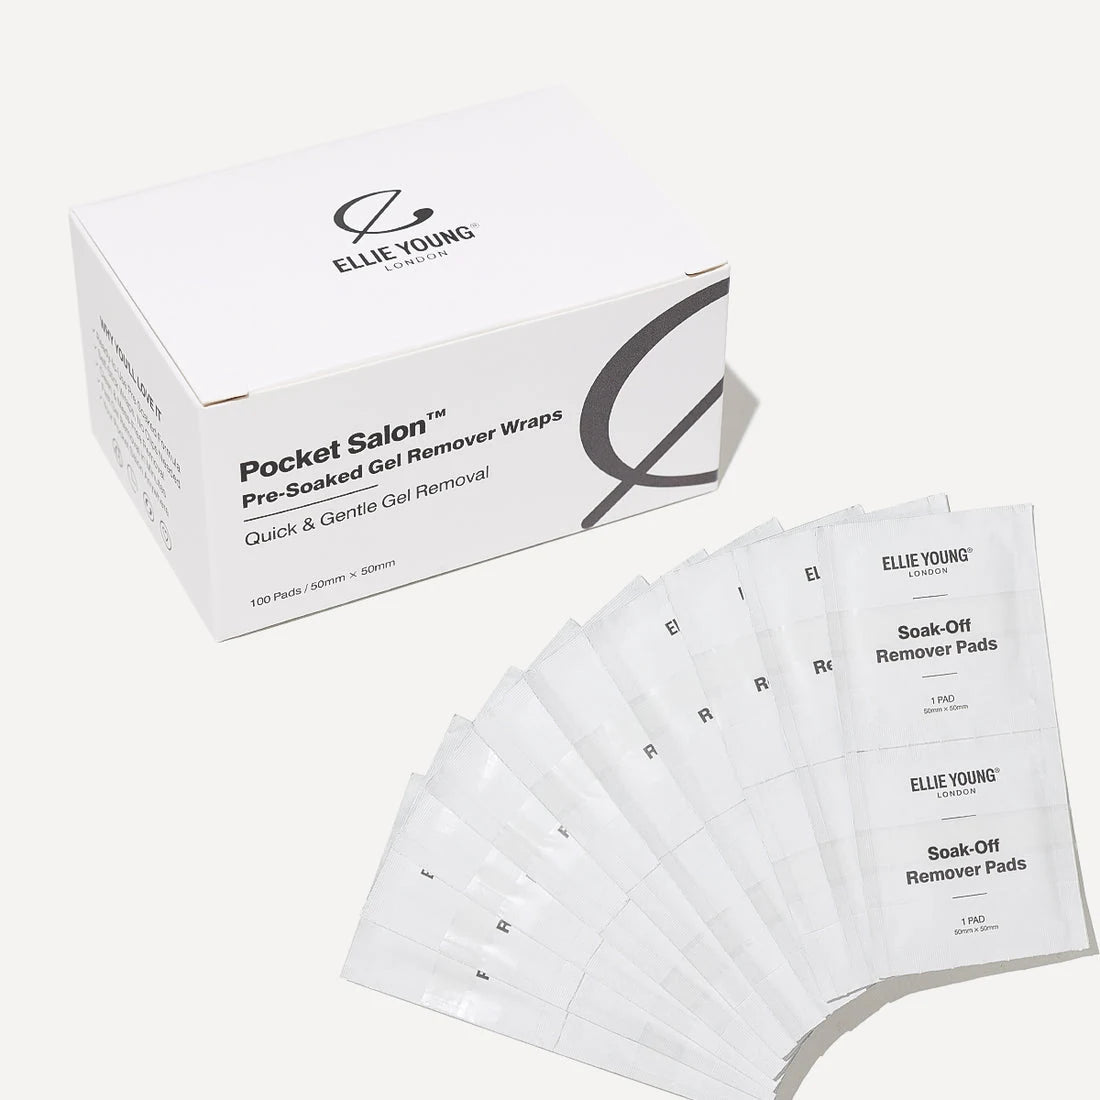
According to the product specs, Teré Gel Remover Pads are pre-cut foil wraps with integrated absorbent pads intended for gel polish, acrylic, and dip powder removal. Because the cotton element is already secured inside a tailored foil envelope, you bypass the clumsy juggling of loose cotton pads and tearing kitchen foil with wet fingertips. Utilizing purpose-built acetone wraps ensures uniform saturation directly across the polymer layer, preventing the common frustration of dry edges lifting mid-soak. In addition to these specialized wraps, an effective setup requires a balanced 100/180 grit nail file, professional-strength acetone, a smooth wooden cuticle pusher, and a deeply nourishing cuticle oil to replenish lost lipids.
| Essential Tool | Primary Function | Why It Matters for Nail Health |
|---|---|---|
| 100/180 Grit Nail File | Roughs up the glossy protective seal | Enables solvent entry without touching bare nail |
| Teré Gel Remover Pads | Pre-cut foil wraps with integrated absorbent pads | Locks solvent and body heat over the nail bed |
| Pure Salon Acetone | Breaks down cured polymer resin | Dissolves gel cleanly without mechanical scraping |
| Wooden Cuticle Stick | Gently glides off softened residue | Softer than metal, protecting fragile wet keratin |
| Nourishing Cuticle Oil | Restores deep surface lipid levels | Prevents brittleness and peeling after soaking |
Setting up your workspace thoughtfully makes the entire process feel like a relaxing salon ritual. Place a small towel across your table to protect home surfaces from acetone spills, and keep your wooden stick within arm reach before securing your final wrap. Investing a few moments to lay out your nail file, moisten your Teré Gel Remover Pads, and position your tools comfortably ensures that your dominant and non-dominant hands navigate the soak without awkward interruptions, guarding your natural keratin against accidental trauma.
Step 1: Why Must You Buff the Shiny Topcoat First?
Cured gel polish consists of cross-linked oligomers designed to form an impenetrable, chip-proof shield over your hands. This glossy topcoat is virtually impervious to acetone on its own, meaning that soaking an unbuffed nail results in wasted time and dried-out skin without dissolving the color underneath. Buffing gel nails breaks this non-porous seal, etching microscopic channels into the polish through which the solvent can travel directly into the pigmented base layers. When learning how to safely remove gel nails at home, mastering this preparation phase is critical because acetone cannot penetrate an intact polymer shell. Breaking top coat protection accelerates the entire breakdown phase, cutting down the overall soaking duration and shielding your surrounding cuticles from prolonged, dehydrating exposure to pure acetone.
How to Buff Without Damaging the Natural Nail
Take your medium-grit file and glide it gently across the surface of each nail using light, circular motions. You only want to remove the shine until the surface appears chalky, matte, and lightly textured across every angle. Pay close attention to the free edge and sidewalls where lifting often starts, but avoid filing down into your natural nail bed. Stopping the file as soon as the color coat becomes dull ensures that your natural keratin remains completely untouched throughout the preparation stage. Consistent, light pressure prevents heat friction from building up on the nail plate, keeping the underlying natural keratin layers intact, strong, and entirely uncompromised before you apply your soaking wraps.
Keep your hand relaxed and let the grit of the file do the work: you are only scratching the shiny outer coat, never thinning the natural nail underneath.
Step 2: How Do You Wrap Nails for Maximum Soaking Efficiency?
Once the shiny topcoat is thoroughly buffed, the next step is applying your soaking wraps snugly to concentrate the liquid directly on the nail plate. Acetone evaporates rapidly when exposed to air, which reduces its potency and cools the fingertip. Trapping the liquid beneath tightly folded foil retains natural body heat, warming the solvent and dramatically accelerating the rate at which the gel polymers crumble and detach. When you tackle wrapping gel nails properly, you eliminate the common mistake of letting the solvent dry out prematurely. Maintaining a secure, airtight seal ensures that the chemical bonds within the cured lacquer soften uniformly across the entire surface rather than lifting only around the exposed perimeter. This careful enclosure protects your surrounding skin from needless friction while concentrating the active formula exactly where it can penetrate deepest into the remaining pigmented coats.
According to the product specs, Teré Gel Remover Pads feature an integrated absorbent pad built directly into each pre-cut foil wrap format. Moisten the interior pad generously with your acetone solution, ensuring it is damp without dripping excessively. Center the damp pad squarely over your buffed nail bed, then fold the side flaps tightly around your finger before tucking the top flap down. The pre-cut dimensions keep the wrap secure so you can treat all ten fingers comfortably without pieces slipping off mid-process. Because these pre-cut foil wraps hold their structure firmly against the flesh, the internal reservoir remains locked precisely over the hard lacquer. Traditional homemade cotton balls often slide around or leak down the knuckles, causing accidental irritation to sensitive cuticles. By contrast, the stationary design of these specialized wraps isolates the liquid, ensuring soaking gel polish remains an efficient, tidy, and predictable treatment from the first finger to the last.
Why Uninterrupted Soaking Time Matters
Allow the wraps to remain undisturbed for ten to fifteen minutes while the solution does the heavy lifting. Resting your hands under a warm towel or sitting in a cozy room helps maintain ambient warmth, which assists the breakdown of stubborn base coats. Resist the urge to slide the foils off early to check progress: opening the wraps releases trapped heat and causes the solvent to evaporate, which prolongs the total soaking time needed for a clean release. Giving the solution sufficient, uninterrupted contact time allows the crosslinked acrylic structure of the polish to disintegrate naturally into loose, crumbly flakes. If you unseal the fingertip too soon, incoming air instantly chills the surface and halts the chemical softening process. Keeping each wrap intact for the entire recommended duration ensures that the hardened layer releases cleanly without requiring aggressive manual scraping later.
Step 3: What Is the Right Way to Push Off Softened Gel?
After the soaking period finishes, work on one finger at a time while leaving the other nails wrapped to prevent premature air drying. Slide the first foil wrap off with a gentle twisting motion, which often takes the bulk of the lifted polish away inside the pad itself. The remaining gel on your nail should look bubbly, cracked, and visibly detached from the nail surface, resembling soft cottage cheese rather than a solid plastic coating. Exposing every nail to the room at the same moment causes acetone to evaporate in seconds, instantly re-hardening the cured resin and undoing your entire soaking effort. When mastering how to safely remove gel nails at home, removing softened gel from each plate individually retains the trapped humidity and solvent heat under the adjacent Teré Gel Remover Pads until you are actively ready to clean that specific digit.
Using the Proper Angle with a Wooden Stick
Take the beveled edge of a wooden orange stick and hold it at a low angle against your nail bed. Glide the stick forward from the cuticle toward the free edge, nudging the softened crumbly residue away without applying downward pressure. Natural keratin is temporarily soft while wet from acetone, making gentle handling essential. A flat, low angle allows the wooden cuticle stick to slide underneath the swollen polymer rather than gouging downward into the delicate natural tissue underneath. Wooden tools are purposefully soft and fibrous, ensuring that the instrument yields or blunts before it can scratch the nail plate. Metal scrapers or hard pushers, by contrast, focus excessive pressure onto single contact points, denting the soft surface and indenting the underlying dorsal layer.
If product resists, never scrape harder: slide the wrap back on for another five minutes so the solvent finishes the work without peeling your natural nail.
Peeling prevention requires recognizing the exact physical threshold between broken chemical bonds and intact adhesion. If you encounter a stubborn patch that resists light sliding, never scrape, pry, or pick at it: simply re-wrap that finger for an additional five minutes until the adhesive bond releases naturally on its own. Forcing semi-dissolved product away from the nail bed strips the uppermost layers of keratin cells along with it. These micro-tears manifest as rough white patches, thinned nail plates, and brittle free edges that can take months to grow out fully. Allowing acetone extra time to penetrate remaining base coat clusters ensures that the stubborn resin lets go effortlessly, preserving the smooth integrity of your natural nail structure without manual trauma.
Which Mistakes Cause the Most Damage During At-Home Gel Removal?
The single most destructive mistake during gel removal is peeling, chipping, or biting lifted polish off the nail plate. Because the cured base coat fuses securely with the top layer of nail cells, pulling off lifted gel forcibly tears away those delicate keratin sheets. This mechanical trauma leads to paper-thin nails, sensitive fingertips, deep ridges, and persistent white spots that require months of regrowth to repair completely. These classic gel removal mistakes cause severe nail plate damage that no quick topical polish can instantly mend. Whenever an edge begins to lift, resist the urge to pull it away from the surface. Forcibly separating cured product removes multiple layers of natural keratin, leaving the exposed nail bed vulnerable to painful tearing, structural weakness, and prolonged dehydration.
Another frequent error is reaching for rigid metal scraper tools or aggressive electric files without professional training. Metal scrapers gouge softened nail beds, creating rough surface irregularities that weaken the entire structure. Skipping the initial buffing step, rushing the soak time, or letting acetone evaporate from loosely folded kitchen foil also causes unnecessary frustration. Substandard wraps expose surrounding skin to pure acetone while failing to trap the solvent against the gel, resulting in inflamed skin and painfully dry cuticles. Understanding how to safely remove gel nails at home means relying on patience: when you notice patches that refuse to glide off effortlessly, re-saturating the wrap and waiting another few minutes prevents permanent surface trauma.
How to Safely Troubleshoot Stubborn Gel Polish
When gel polish clings stubbornly to the center or edges of your nail plate, aggressive mechanical force should never be your backup plan. Stubborn remnants usually indicate that the non-porous topcoat was not broken down sufficiently during the initial filing stage, or that the acetone wrap lost contact with the polish. Instead of scraping harder against a delicate nail bed, lightly file the shiny surface of that specific residual patch to break its seal once more. Re-apply a fresh soak wrap, such as the pre-cut foil wraps with integrated absorbent pads from TERÉ ESSENTIALS, ensuring the saturated pad sits snugly over the remaining gel. Allow the acetone to dissolve the product for an extra five to ten minutes under steady body warmth before attempting another gentle removal sweep.
Post-Removal Care: How Do You Restore Moisture to Bare Nails?
Acetone is an exceptionally effective solvent for dissolved resins, but it temporarily strips the natural moisture and lipid barrier from your nails and surrounding cuticles. Once all residue is safely removed, wash your hands thoroughly with lukewarm water and a gentle cleanser to eliminate remaining solvent traces. Lightly buff the bare nail with a high-grit smoothing block only if microscopic residue remains, keeping manipulation to an absolute minimum. Because pure solvent exposure leaves the dorsal nail plate porous and temporarily brittle, immediate nail aftercare is necessary to replenish the lost sebum and prevent flaking along the free edge. You should avoid applying alcohol-based sanitizers or harsh detergents immediately after soaking, as freshly exposed keratin layers absorb ambient moisture and environmental chemicals very rapidly.
Restoring Cuticle Hydration and Nail Recovery
Finish your routine by massaging a generous amount of nourishing plant oil into the cuticle fold, nail plate, and fingertip skin, following with a barrier-repairing hand cream. Giving your natural nails a brief rest between applications allows the keratin structure to rehydrate, re-harden, and regain its natural flexibility. Dedicated cuticle hydration softens the proximal nail fold, supporting healthy cell turnover at the matrix where new nail growth originates. For comprehensive nail recovery, seal in lightweight botanical oils with a dense, emollient balm before going to bed, giving the lipids several uninterrupted hours to penetrate deep between individual keratinocytes. When you are ready for a clean reset on your next manicure, keep the process easy and gentle by using Teré Gel Remover Pads for safe, comfortable at-home care.
FAQ
How long should gel nails soak before sliding off smoothly?
Gel nails generally require ten to fifteen minutes of uninterrupted soaking under snugly wrapped foil to dissolve properly. If your manicure included extra builder gel, multiple topcoat layers, or dense glitter pigments, you may need up to twenty minutes of soaking. Checking one test finger first lets you see if the product has bubbled and loosened before unwrapping the rest.
Can peeling off gel polish actually damage the natural nail plate?
Yes, peeling gel polish pulls away microscopic surface layers of natural keratin along with the artificial coating. This mechanical pulling leads to severe thinning, brittle edges, peeling layers, and noticeable white superficial patches across the nail bed. Letting solvent dissolve the chemical bond completely is the only reliable way to keep your natural nails thick and resilient.
Why are pre-cut foil remover wraps better than standard cotton balls and foil?
Pre-cut foil wraps featuring integrated absorbent pads provide a far more secure, airtight fit than homemade kitchen foil squares. They prevent acetone from dripping onto your skin or evaporating into the air, holding both liquid and body heat securely against the nail surface. This specialized design speeds up product breakdown while eliminating the clumsy frustration of tearing loose foil with wet fingertips.
How often can you wear gel polish without weakening your nails?
You can wear gel polish continuously as long as each removal process is handled gently without scraping, peeling, or over-buffing the natural nail plate. However, scheduling a short rest period of one to two weeks every few months allows natural lipids to replenish thoroughly. During these breaks, applying daily cuticle oils and rich restorative hand balms restores optimal flexibility to bare nails.

Efterlad en kommentar
Denne side er beskyttet af hCaptcha, og hCaptchas Politik om beskyttelse af persondata og Servicevilkår er gældende.